31 January 24
The server that was hosting the two websites that we self host had recently conked out on us. It was an old server, and a bit on the clunky side. In the attempt to repair what we thought was simply a power supply issue, we found out that the motherboard was faulty as well.
We decided to replace the server altogether with those new machines which are advertised as mini-desktops. Something like an Intel NUC—although we purchased a different brand that uses an AMD CPU. Our old server was deployed using virtual machines on an ESXI hypervisor. We had two NGINX endpoint VMs and another reverse-proxy VM. I was not the one to set all this up, my dad did it, and he used an NGINX imaged Kubernetes pod deployed on a Kubernetes cluster. All I had to do was set up my own VM, its NGINX configuration, and provide my domain name registrar with the appropriate public IP address.
This time, we had the opportunity to try something new altogether. I was less busy at the time, and so I was tasked with doing the setup. As someone who was very inexperienced with networking, I used the opportunity to gain some experience.
I decided to use FreeBSD and its Jails system to emulate the configuration we had previously. My dad and I both had our own scripts and methods of updating our respective websites, so we needed a setup that would not disrupt the way we had been doing things. After all, we made those scripts with the idea that they would be relatively future proof.
The terminology can be quite esoteric thus far, so some attempt at explanation would be useful. To set up a website and host it, you need a few things to happen. The best way I can explain it is by walking through what happens when you access a website.
The first thing that happens when you type a web address into your browser is that your computer sends a request to translate the domain name (the website name e.g. google.com) into an IP address. This request gets sent out into the internet where it heads to a DNS server. If you have not configured either your router or your computer to send these requests to a specific DNS server, then your ISP (internet service provider) sends it to its default DNS server.
Either way, when this request reaches the DNS server, the server looks up the name, and returns an IP address. This IP address is public, and unique. This information is relayed back to your computer.
Armed with this new information, your computer can now send out an official http request to the appropriate address. When the request reaches the server with the IP address, the server uses software to read the request, and serve up the relevant files based on its configuration. It uses the return address to send the files back to your computer, and the browser renders the file in front of your eyes.
The first step in the process is to purchase a domain name. To do this, you need to find a domain name registrar, see if your chosen domain name is available, and if so, create an account and purchase the domain name. When you do this, you reserve the right to change the IP address that DNS servers will return when they look up the domain name you have purchased. In most cases, you set the IP address through the account that you have created with the registrar.
When you find the part where you can set the IP address, you want to set it to your public IP address. Assuming you only have one internet service provider, your unique public IP address can be found by accessing websites such as this. After you have saved those changes, DNS servers should now point to your IP address when they are queried with your domain name.
Now comes the hard part. To set up the server as I have, you first need to install FreeBSD onto the server. That process is outlined in chapter 2 of the FreeBSD handbook. I personally had no issues with this up until the network setup.
The base FreeBSD didn’t have the appropriate network drivers for the
network card on our server. This wasn’t a issue that had a trivial
workaround. I had to install the realtek-re-kmod package
using pkg, neither of which were installed by default. This
left me with a bit of a chicken-and-egg situation. Doing a bit of
research, I came across this
thread in the FreeBSD forums.
So the first course of action was to download both packages onto a
thumbdrive and transfer the contents onto the server. Even this bit came
with its complications. You can’t just download the latest versions of
the packages by browsing the official
repository, because access is forbidden. So to download the correct
file, you instead need to head over to pkgs.org, and search for both
pkg and realtek-re-kmod, then scroll down all
the way until you get the right OS and architecture. In my case it was
FreeBSD 14 on the amd64 architecture, and it lead to this
page.
Then, you need to scroll down to the “Download” section, where there
should be a table that shows the URL for the binary package. Enter that
URL into your browser, and the file should begin downloading. I
downloaded the two packages I needed and loaded them onto a thumbdrive.
The next thing to do was to transfer the packages into the
/tmp directory of the server and then run the following
commands from within /tmp:
tar xf pkg-1.20.9.pkg
usr/local/sbin/pkg-static add pkg-1.20.9.pkg
pkg add realtek-re-kmod-199.00_1.pkg
rm -r usr +COMPACT_MANIFEST +MANIFEST pkg-1.20.9.pkg realtek-re-kmod-199.00_1.pkg
The above bootstraps the install of the pkg package, and
uses that to install the relevant driver package. The last thing I had
to do was configure the driver to run at boot and to use DHCP. By
enabling DHCP (Dynamic Host Configuration Protocol), you hand over the
responsibility of assigning the private IP address of the machine
(client) over to the router (server).
To load the drivers, add the following to
/boot/loader.conf:
if_re_load="YES"
if_re_name="/boot/modules/if_re.ko"
And to enable DHCP, add the following line to
/etc/rc.conf:
ifconfig_re0="DHCP"And after rebooting, my ethernet was finally working! The only thing
to note is that the name of the network interface is re0
now.
Now, I intended to choose a jail management system that would make working with jails easier. After a bit of research, I decided to use BastilleBSD as the jail manager, it seemed somewhat popular, and had the hallmark signs of being a good solution. It was lightweight in that it had no further dependencies, and it was also feature rich.
Run the following commands:
pkg install bastille
sysrc bastille_enable=YES
The first line installs BastilleBSD and the second manages
containers/jails at startup and shutdown. At this point, you may want to
use the bastille setup subcommand. I only found out about
this command after I had done all the setup I had needed. It seems to do
all the setup that is generally outlined in the main resources available
on BastilleBSD. Since I have not used the command myself, I cannot
guarantee that it works, but the limited documentation can be found here.
If you don’t want to risk it, and prefer to do what I did, you can either read the official getting started guide, or continue reading.
The basic configuration of bastille is done through the
/usr/local/etc/bastille/bastille.conf configuration file,
and I changed the following entries:
bastille_zfs_enable="YES"
bastille_zfs_zpool="zroot"
Next, configure the bastille0 loopback interface:
sysrc cloned_interfaces+=lo1
sysrc ifconfig_lo1_name="bastille0"
service netif cloneup
Now we can create the firewall rules by first creating
/etc/pf.conf and adding the following:
ext_if="vtnet0"

set block-policy return
scrub in on $ext_if all fragment reassemble
set skip on lo

table <jails> persist
nat on $ext_if from <jails> to any -> ($ext_if:0)
rdr-anchor "rdr/*"

block in all
pass out quick keep state
antispoof for $ext_if inet
pass in inet proto tcp from any to any port ssh flags S/SA keep state
Just make sure to change vtnet0 to the name of your
external interface, mine was re0.
Enable the firewall with:
sysrc pf_enable=YES
service pf start
If you are using an SSH connection to server, that last step is going to disconnect you, just reconnect.
Now we can bootstrap a release to use for our jails. You may be wondering what that is. The main purpose is to make the creation of jails a whole lot faster. When creating jails, all the default system files need to be fetched and put in the right places. Bootstrapping is a one-time process that fetches those files and creates a ‘template’ of a fresh install. When you have a template ready, all that is required to create a jail is to create a copy of that template for the jail to use. You can bootstrap multiple releases if you want your jails to use specific versions of FreeBSD. I just want to use the latest release, so I did the following:
bastille bootstrap 14.0-RELEASE updateAnd we have done all the setup to start creating our jails!
You may be wondering why we go through all the trouble of setting this up when it can be done simply using NGINX configuration. My main reason for doing so was due to my confidence in setting things up correctly from the get go. There was a good chance that I wasn’t going to correctly set up the configuration on the first try.
What tends to happen is that I give it a go and usually get it wrong. When that happens, I need to undo what I tried (which may not always be possible). This involves file changes and file deletion. When I go through this process, I get that feeling that I may have missed a step, and I usually can’t do anything about it.
Being able to quickly create and destroy containers means that when I make a mistake, I can wipe the slate clean and start over, should I wish to. This luxury also meant that when I was confident in how the containers ought to be set up, I was finally left with a clean, correct setup to serve the original purpose.
We need to build a reverse proxy, and two static web servers, a total of three jails. A static web server is a server that returns the appropriate files when a http or https request asks for certain files. We need two of those since we are setting up two websites.
The issue is that we only have one public IP address to use. That means that in DNS servers, there are two domain names that resolve to our one public IP address. That’s where the reverse proxy server comes in. A reverse proxy server is a server that takes a http or https request, determines which web server that request should be sent to, sends it there, takes the result, and sends it back out. This means that we can host two different websites even when we only have one public IP address.
First, I decided to create the static web servers. I needed to be
able to ssh into these servers from machines in the local
network. As far as I can tell, the simplest way to get these jails to
almost act like their own servers is to create the jail with a VNET
(virtual network) network interface. I had tried to use port redirection
which is supported in BastilleBSD, but I must have done something wrong,
as I couldn’t get it to work. Anyways, when I had given up, I looked
through the documentation of the VNET interface and found that I could
get what I wanted with it. I was also able to get it to use DHCP to
assign the IP addresses:
bastille create -V website-1 14.0-RELEASE 0.0.0.0 re0
bastille create -V website-2 14.0-RELEASE 0.0.0.0 re0
Of course, I named the jails after their domain name. The
-V option indicates that we want to use a VNET interface,
and when we create a jail, we need to specify which bootstrapped release
we wish to base it off. Normally, with the creation of jails, you
specify an IP address that you may use when doing networking within the
host machine amongst jails. This time, we created the jails and provided
0.0.0.0 as the IP address. When combined with the
-V option, this specifies that we want to create a jail
that has its IP address assigned via DHCP. By doing that, we were able
to maintain the status quo of setting static IP addresses centrally
through our router. Finally, we specify the network interface that we
want to use to build the VNET interface. This is simply the name of the
network interface of the host machine.
We can see the list of running containers using:
bastille listNext I needed to enable ssh:
bastille sysrc website-1 sshd_enable=YES
bastille sysrc website-2 sshd_enable=YES
And to start the service:
bastille service website-1 sshd start
bastille service website-2 sshd start
Now it is time to enter the jails for preliminary setup:
bastille console <jail-name>Upon entering, we need to install the packages necessary to run the
webserver. We also need to create user accounts (in my case) as that was
one way we could ssh into these jails from seperate
machines. By default, when you create a jail anc console
into it, only the root user exists. But by default, you cannot
ssh into a machine as the root user. So the options are to
either create another user account and change into root only when
needed, or to change the default behaviour of ssh to allow
login as root. The latter sounded somewhat unsafe so I went with the
former.
To create a user issue the self-explanatory command
adduser:
root@website-1:~ # adduser
Username: philip
Full name:
Uid (Leave empty for default):
Login group [philip]:
Login group is philip. Invite philip into other groups? []: wheel
Login class [default]:
Shell (sh csh tcsh nologin) [sh]:
Home directory [/home/philip]:
Home directory permissions (Leave empty for default):
Use password-based authentication? [yes]:
Use an empty password? (yes/no) [no]:
Use a random password? (yes/no) [no]:
Enter password:
Enter password again:
Lock out the account after creation? [no]:
Username   : philip
Password   : *****
Full Name  :
Uid        : 1001
Class      :
Groups     : philip wheel
Home       : /home/philip
Home Mode  :
Shell      : /bin/sh
Locked     : no
OK? (yes/no) [yes]:
adduser: INFO: Successfully added (philip) to the user database.
Add another user? (yes/no) [no]:
Goodbye!
Most of the defaults are good, the only change I made was to add the
user to the wheel group so that the user can switch user to
be root. Now it is time to see if we can get NGINX to work,
first, we install it:
pkg install nginxThen we need to enable the service:
sysrc nginx_enable=YESAnd then we start the service:
service nginx startNow theoretically, the jail should be serving up the default static
content on the local network at its IP address. To verify that, first
exit from the jail and run the following command on the
FreeBSD machine:
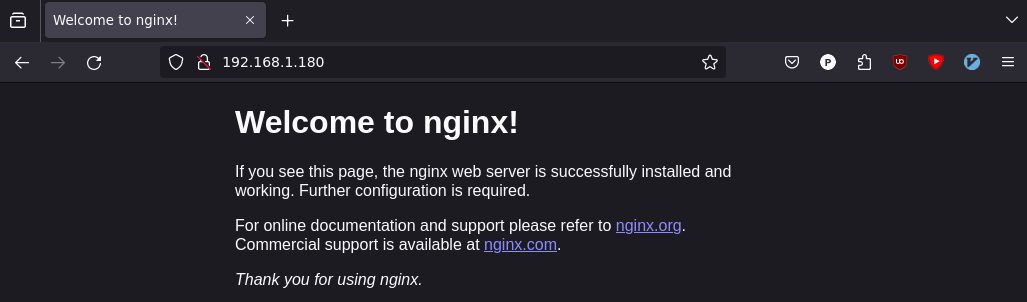
bastille list allThe table printed will list the IP address of the jail. Put that IP address into the URL bar of a web browser on a machine in the same local network, and you should see the following:
If you do, well done! You have a working NGINX web server now. Now you need to follow the exact same steps for the second jail. With both web servers serving up static content on your network, we can now set up the web proxy.
To set up the web proxy, we create a new jail as before:
bastille create -V web-proxy 14.0-RELEASE 0.0.0.0 re0I personally did not need to set up ssh for this jail as
I do not foresee repeated interaction with it. As NGINX can also act as
a reverse proxy, I chose to use it for our implementation. Again, we
install NGINX:
pkg install nginxBut before we enable the service, some other important things need to be done.
For these jails to work as intended, we need to give them static IP addresses. This can be done in a few ways, and ultimately, your home network setup will dictate which methods won’t work for you. For my home network, we have a pfsense router which can be configured to set static IP addresses. Since we have set up our jails to obtain their IP address via DHCP (leave it to the router), we will set their static IP addresses via the pfsense machine.
I prefer that method as it leaves network configuration solely in the hands of my router. In any case you need to set static IP addresses for the three jails, as not doing so will lead to those IP addresses potentially being changed for any number of reasons. We need the explicit static IP addresses for the web proxy configuration, so if these IP addresses change, the websites will not work.
After this step is complete, you have to configure your router to forward all http and https traffic to your web proxy. Again, how this is done will depend on what software your router uses. In most cases there will be a setting to configure, and all you need to do is put in the IP address of the web proxy where required.
If there is no setting specifying http or https, but there is a setting to specify forwarding traffic from certain ports to a seperate IP address, then you can configure ports 80 (http) and 443 (https) to forward to the web proxy IP address.
Now, we need only to configure the web proxy’s NGINX to function as a
web proxy. This involves editing NGINX’s configuration file. For
FreeBSD, this file is /usr/local/etc/nginx/nginx.conf, and
we need to make some changes to the default configuration.
Below is an example of how the final state of the file ought to be.
The meat of the changes belong in the http block. In it, we
define two virtual servers.
worker_processes  1;

events {
    worker_connections  1024;
}

http {
    include       mime.types;
    default_type  application/octet-stream;


    sendfile        on;

    keepalive_timeout  65;

    server {
        server_name  website1.com www.website1.com;

        location / {
                proxy_pass http://192.168.1.16:80;
                proxy_set_header Host $host;
                proxy_set_header X-Real-IP $remote_addr;
                proxy_set_header X-Forwarded-For $proxy_add_x_forwarded_for;
                proxy_set_header X-Forwarded-Proto $scheme;
        }
}

    server {
        server_name  website2.com;

        location / {
                proxy_pass http://192.168.1.50:80;
                proxy_set_header Host $host;
                proxy_set_header X-Real-IP $remote_addr;
                proxy_set_header X-Forwarded-For $proxy_add_x_forwarded_for;
                proxy_set_header X-Forwarded-Proto $scheme;
        }
}
}
Virtual servers are exactly what they sound like, but for our case,
we can almost think of them as real servers. When a http request reaches
the web proxy, NGINX “tests the request’s Host header field
against the server_name directives in the
server blocks”, according to the official NGINX
documentation.
This means that our configuration tells NGINX to send requests that
are looking for website1.com or
www.website1.com to the address
192.168.1.16:80, and requests that are looking for
website2.com to the address 192.168.1.50:80.
Of course, you need to specify the correct IP addresses that you have
set for the web servers.
We need to specify the port number as well because NGINX doesn’t
assume how you want the ports configured in your setup. The rest of the
proxy_set_header lines allow for all the appropriate
information to be in the http headers so that when the
files are sent back they go to the right places.
Once those changes have been made, we need to enable the
nginx service as well as start it:
sysrc nginx_enable=YES
service nginx start
Now we need to check whether it is possible to access your website
via its domain name using http only. If your browser tells
you that it is unsafe, just try to circumvent the warnings to see if the
process works. If you see the nginx welcome page for both
websites, it may be a sign that all the configuration so far has been
done correctly.
To ensure that is the case, we need to tweak the respective websites
to indicate which ones they are. This also gives us the opportunity to
familiarise ourselves with where the html files are kept. Go to the
/usr/local/www/nginx folder in each of the webservers and
edit the index.html file to reflect the different
websites.
When I normally do it, I just change the word “nginx” with the domain
name. When the changes are made, access the websites via their domain
names and verify if the changes are reflected correctly. If so, the last
step is to set up https for your websites.
https setupFor https, we need certificates and an intricate nginx
configuration. When it comes to security, I generally feel that unless
you are well versed in all the principles, it’s best go with automatic
solutions that make sure your setup is correct. Many people use the certbot solution, and that’s what I
chose to use as well.
Enter the web proxy jail and install certbot:
pkg install security/py-certbot-nginxThen run certbot to do the necessary configuration:
certbot --nginxThis is an interactive setup, and when it prompts you about which
domains you want to set https up for, please select all.
When the setup is over, and done successfully, you should be able to
verify it by accessing your websites via their domain names using
https. Now you need to make sure that those certificates
are renewed before they expire.
To test whether the automatic renewal works, run the following command:
certbot renew --dry-runAnd now it is up to you to set up your website how you want. Enjoy.
Best Regards,
Philip